
Expo
Prerequisites
Section titled “Prerequisites”- Recommended: Bun 1.2 or higher
- Node.js 23.0.0 or higher
To use LiveStore with Expo, ensure your project has the New Architecture enabled. This is required for transactional state updates.
Option A: Quick start
Section titled “Option A: Quick start”For a quick start we recommend using our template app following the steps below.
For existing projects see Existing project setup.
-
Set up project from template
Terminal window bunx tiged github:livestorejs/livestore/examples/standalone/expo-todomvc-sync-cf#main livestore-appTerminal window pnpm dlx tiged github:livestorejs/livestore/examples/standalone/expo-todomvc-sync-cf#main livestore-appTerminal window npx tiged github:livestorejs/livestore/examples/standalone/expo-todomvc-sync-cf#main livestore-appTerminal window yarn dlx tiged github:livestorejs/livestore/examples/standalone/expo-todomvc-sync-cf#main livestore-appReplace
livestore-appwith your desired app name. -
Install dependencies
It’s strongly recommended to use
bunorpnpmfor the simplest and most reliable dependency setup (see note on package management for more details).Terminal window bun installTerminal window pnpm install --node-linker=hoistedMake sure to use
--node-linker=hoistedwhen installing dependencies in your project or add it to your.npmrcfile..npmrc nodeLinker=hoistedHopefully Expo will also support non-hoisted setups in the future.
Terminal window npm installWhen using
yarn, make sure you’re using Yarn 4 or higher with thenode-moduleslinker.Terminal window yarn set version stableyarn config set nodeLinker node-modulesyarn installPro tip: You can use direnv to manage environment variables.
-
Run the app
Terminal window bun startTerminal window pnpm startTerminal window npm run startTerminal window yarn startIn a new terminal, start the Cloudflare Worker (for the sync backend):
Terminal window bun wrangler:devTerminal window pnpm wrangler:devTerminal window npm run wrangler:devTerminal window yarn wrangler:dev
Option B: Existing project setup
Section titled “Option B: Existing project setup”-
Install dependencies
Terminal window bun install @livestore/devtools-expo @livestore/adapter-expo @livestore/livestore @livestore/react @livestore/sync-cf @livestore/peer-deps expo-sqliteTerminal window pnpm install @livestore/devtools-expo @livestore/adapter-expo @livestore/livestore @livestore/react @livestore/sync-cf @livestore/peer-deps expo-sqliteTerminal window npm install @livestore/devtools-expo @livestore/adapter-expo @livestore/livestore @livestore/react @livestore/sync-cf @livestore/peer-deps expo-sqliteTerminal window yarn add @livestore/devtools-expo @livestore/adapter-expo @livestore/livestore @livestore/react @livestore/sync-cf @livestore/peer-deps expo-sqlite -
Add Vite meta plugin to babel config file
LiveStore Devtools uses Vite. This plugin emulates Vite’s
import.meta.envfunctionality.Terminal window bun add -d babel-plugin-transform-vite-meta-envTerminal window pnpm add -D babel-plugin-transform-vite-meta-envTerminal window yarn add -D babel-plugin-transform-vite-meta-envTerminal window npm install --save-dev babel-plugin-transform-vite-meta-envIn your
babel.config.jsfile, add the plugin as follows:babel.config.js /* eslint-disable unicorn/prefer-module */module.exports = (api) => {api.cache(true)return {presets: ['babel-preset-expo'],plugins: ['babel-plugin-transform-vite-meta-env', '@babel/plugin-syntax-import-attributes'],}} -
Update Metro config
Add the following code to your
metro.config.jsfile:metro.config.js /* eslint-disable @typescript-eslint/no-require-imports *//* eslint-disable unicorn/prefer-module */// Learn more https://docs.expo.io/guides/customizing-metroconst { getDefaultConfig } = require('expo/metro-config')const { addLiveStoreDevtoolsMiddleware } = require('@livestore/devtools-expo')/** @type {import('expo/metro-config').MetroConfig} */const config = getDefaultConfig(__dirname)addLiveStoreDevtoolsMiddleware(config, { schemaPath: './src/livestore/schema.ts' })// console.log(config)module.exports = config
Define Your Schema
Section titled “Define Your Schema”Create a file named schema.ts inside the src/livestore folder. This file defines your LiveStore schema consisting of your app’s event definitions (describing how data changes), derived state (i.e. SQLite tables), and materializers (how state is derived from events).
Here’s an example schema:
import { Events, makeSchema, Schema, SessionIdSymbol, State } from '@livestore/livestore'
// You can model your state as SQLite tables (https://docs.livestore.dev/reference/state/sqlite-schema)export const tables = {  todos: State.SQLite.table({    name: 'todos',    columns: {      id: State.SQLite.text({ primaryKey: true }),      text: State.SQLite.text({ default: '' }),      completed: State.SQLite.boolean({ default: false }),      deletedAt: State.SQLite.integer({ nullable: true, schema: Schema.DateFromNumber }),    },  }),  // Client documents can be used for local-only state (e.g. form inputs)  uiState: State.SQLite.clientDocument({    name: 'uiState',    schema: Schema.Struct({ newTodoText: Schema.String, filter: Schema.Literal('all', 'active', 'completed') }),    default: { id: SessionIdSymbol, value: { newTodoText: '', filter: 'all' } },  }),}
// Events describe data changes (https://docs.livestore.dev/reference/events)export const events = {  todoCreated: Events.synced({    name: 'v1.TodoCreated',    schema: Schema.Struct({ id: Schema.String, text: Schema.String }),  }),  todoCompleted: Events.synced({    name: 'v1.TodoCompleted',    schema: Schema.Struct({ id: Schema.String }),  }),  todoUncompleted: Events.synced({    name: 'v1.TodoUncompleted',    schema: Schema.Struct({ id: Schema.String }),  }),  todoDeleted: Events.synced({    name: 'v1.TodoDeleted',    schema: Schema.Struct({ id: Schema.String, deletedAt: Schema.Date }),  }),  todoClearedCompleted: Events.synced({    name: 'v1.TodoClearedCompleted',    schema: Schema.Struct({ deletedAt: Schema.Date }),  }),  uiStateSet: tables.uiState.set,}
// Materializers are used to map events to state (https://docs.livestore.dev/reference/state/materializers)const materializers = State.SQLite.materializers(events, {  'v1.TodoCreated': ({ id, text }) => tables.todos.insert({ id, text, completed: false }),  'v1.TodoCompleted': ({ id }) => tables.todos.update({ completed: true }).where({ id }),  'v1.TodoUncompleted': ({ id }) => tables.todos.update({ completed: false }).where({ id }),  'v1.TodoDeleted': ({ id, deletedAt }) => tables.todos.update({ deletedAt }).where({ id }),  'v1.TodoClearedCompleted': ({ deletedAt }) => tables.todos.update({ deletedAt }).where({ completed: true }),})
const state = State.SQLite.makeState({ tables, materializers })
export const schema = makeSchema({ events, state })
Add the LiveStore Provider
Section titled “Add the LiveStore Provider”To make the LiveStore available throughout your app, wrap your app’s root component with the LiveStoreProvider component from @livestore/react. This provider manages your app’s data store, loading, and error states.
Here’s an example:
import { makePersistedAdapter } from '@livestore/adapter-expo'import { nanoid } from '@livestore/livestore'import { LiveStoreProvider } from '@livestore/react'import { makeCfSync } from '@livestore/sync-cf'import { StatusBar } from 'expo-status-bar'import React from 'react'import { Button, StyleSheet, Text, unstable_batchedUpdates as batchUpdates, View } from 'react-native'
import { Filters } from './components/Filters.tsx'import { ListTodos } from './components/ListTodos.tsx'import { Meta } from './components/Meta.tsx'import { NewTodo } from './components/NewTodo.tsx'import { events, schema, tables } from './livestore/schema.ts'
const storeId = process.env.EXPO_PUBLIC_LIVESTORE_STORE_IDconst syncUrl = process.env.EXPO_PUBLIC_LIVESTORE_SYNC_URL
const adapter = makePersistedAdapter({  sync: { backend: syncUrl ? makeCfSync({ url: syncUrl }) : undefined },})
export const Root = () => {  const [, rerender] = React.useState({})
  return (    <View style={styles.container}>      <LiveStoreProvider        schema={schema}        adapter={adapter}        storeId={storeId}        syncPayload={{ authToken: 'insecure-token-change-me' }}        renderLoading={(_) => <Text>Loading LiveStore ({_.stage})...</Text>}        renderError={(error: any) => <Text>Error: {error.toString()}</Text>}        renderShutdown={() => {          return (            <View>              <Text>LiveStore Shutdown</Text>              <Button title="Reload" onPress={() => rerender({})} />            </View>          )        }}        boot={(store) => {          if (store.query(tables.todos.count()) === 0) {            store.commit(events.todoCreated({ id: nanoid(), text: 'Make coffee' }))          }        }}        batchUpdates={batchUpdates}      >        <InnerApp />      </LiveStoreProvider>      <StatusBar style="auto" />    </View>  )}
const InnerApp = () => (  <>    <NewTodo />    <Meta />    <ListTodos />    <Filters />  </>)
const styles = StyleSheet.create({  container: {    flex: 1,    paddingTop: 60,    backgroundColor: '#fff',    alignItems: 'center',    justifyContent: 'center',    paddingBottom: 32,  },})
Commit events
Section titled “Commit events”After wrapping your app with the LiveStoreProvider, you can use the useStore hook from any component to commit events.
Here’s an example:
import { nanoid } from '@livestore/livestore'import { useQuery, useStore } from '@livestore/react'import React from 'react'import { Keyboard, Pressable, StyleSheet, Text, TextInput, TouchableWithoutFeedback, View } from 'react-native'
import { uiState$ } from '../livestore/queries.ts'import { events } from '../livestore/schema.ts'
export const NewTodo: React.FC = () => {  const { store } = useStore()  const { newTodoText } = useQuery(uiState$)
  const updatedNewTodoText = (text: string) => store.commit(events.uiStateSet({ newTodoText: text }))  const todoCreated = () =>    store.commit(events.todoCreated({ id: nanoid(), text: newTodoText }), events.uiStateSet({ newTodoText: '' }))  const addRandom50 = () => {    const todos = Array.from({ length: 50 }, (_, i) => ({ id: nanoid(), text: `Todo ${i}` }))    store.commit(...todos.map((todo) => events.todoCreated(todo)))  }  const reset = () => store.commit(events.todoClearedCompleted({ deletedAt: new Date() }))
  const inputRef = React.useRef<TextInput>(null)
  return (    <TouchableWithoutFeedback      onPress={() => {        Keyboard.dismiss()        inputRef.current?.blur()      }}    >      <View style={styles.container}>        <TextInput          ref={inputRef}          style={styles.input}          value={newTodoText}          onChangeText={updatedNewTodoText}          onKeyPress={(e) => {            if (e.nativeEvent.key === 'Escape' || e.nativeEvent.key === 'Tab') {              Keyboard.dismiss()              inputRef.current?.blur()            }          }}          onSubmitEditing={todoCreated}        />        <Pressable onPress={todoCreated}>          <Text style={styles.submit}>Add</Text>        </Pressable>        <Pressable onPress={addRandom50}>          <Text style={styles.submit}>Random (50)</Text>        </Pressable>        <Pressable onPress={reset}>          <Text style={styles.submit}>Clear</Text>        </Pressable>      </View>    </TouchableWithoutFeedback>  )}
const styles = StyleSheet.create({  container: {    flex: 1,    flexDirection: 'row',    flexGrow: 0,    flexBasis: 100,    flexShrink: 0,    alignItems: 'center',    padding: 10,    width: 400,  },  input: {    height: 40,    width: 200,    margin: 12,    borderWidth: 1,    borderRadius: 6,  },  submit: {    padding: 4,    // backgroundColor: 'blue',    borderRadius: 6,    fontSize: 12,  },})
Queries
Section titled “Queries”To retrieve data from the database, first define a query using queryDb from @livestore/livestore. Then, execute the query with the useQuery hook from @livestore/react.
Consider abstracting queries into a separate file to keep your code organized, though you can also define them directly within components if preferred.
Here’s an example:
import { queryDb } from '@livestore/livestore'import { useQuery } from '@livestore/react'import React from 'react'import { FlatList } from 'react-native'
import { uiState$ } from '../livestore/queries.ts'import { tables } from '../livestore/schema.ts'import { Todo } from './Todo.tsx'
const visibleTodos$ = queryDb(  (get) => {    const { filter } = get(uiState$)    return tables.todos.where({      deletedAt: null,      completed: filter === 'all' ? undefined : filter === 'completed',    })  },  { label: 'visibleTodos' },)
export const ListTodos: React.FC = () => {  const visibleTodos = useQuery(visibleTodos$)
  return (    <FlatList      data={visibleTodos}      renderItem={({ item }) => <Todo {...item} />}      keyExtractor={(item) => item.id.toString()}      initialNumToRender={20}      maxToRenderPerBatch={20}    />  )}
Devtools
Section titled “Devtools”To open the devtools, run the app and from your terminal press shift + m, then select LiveStore Devtools and press Enter.
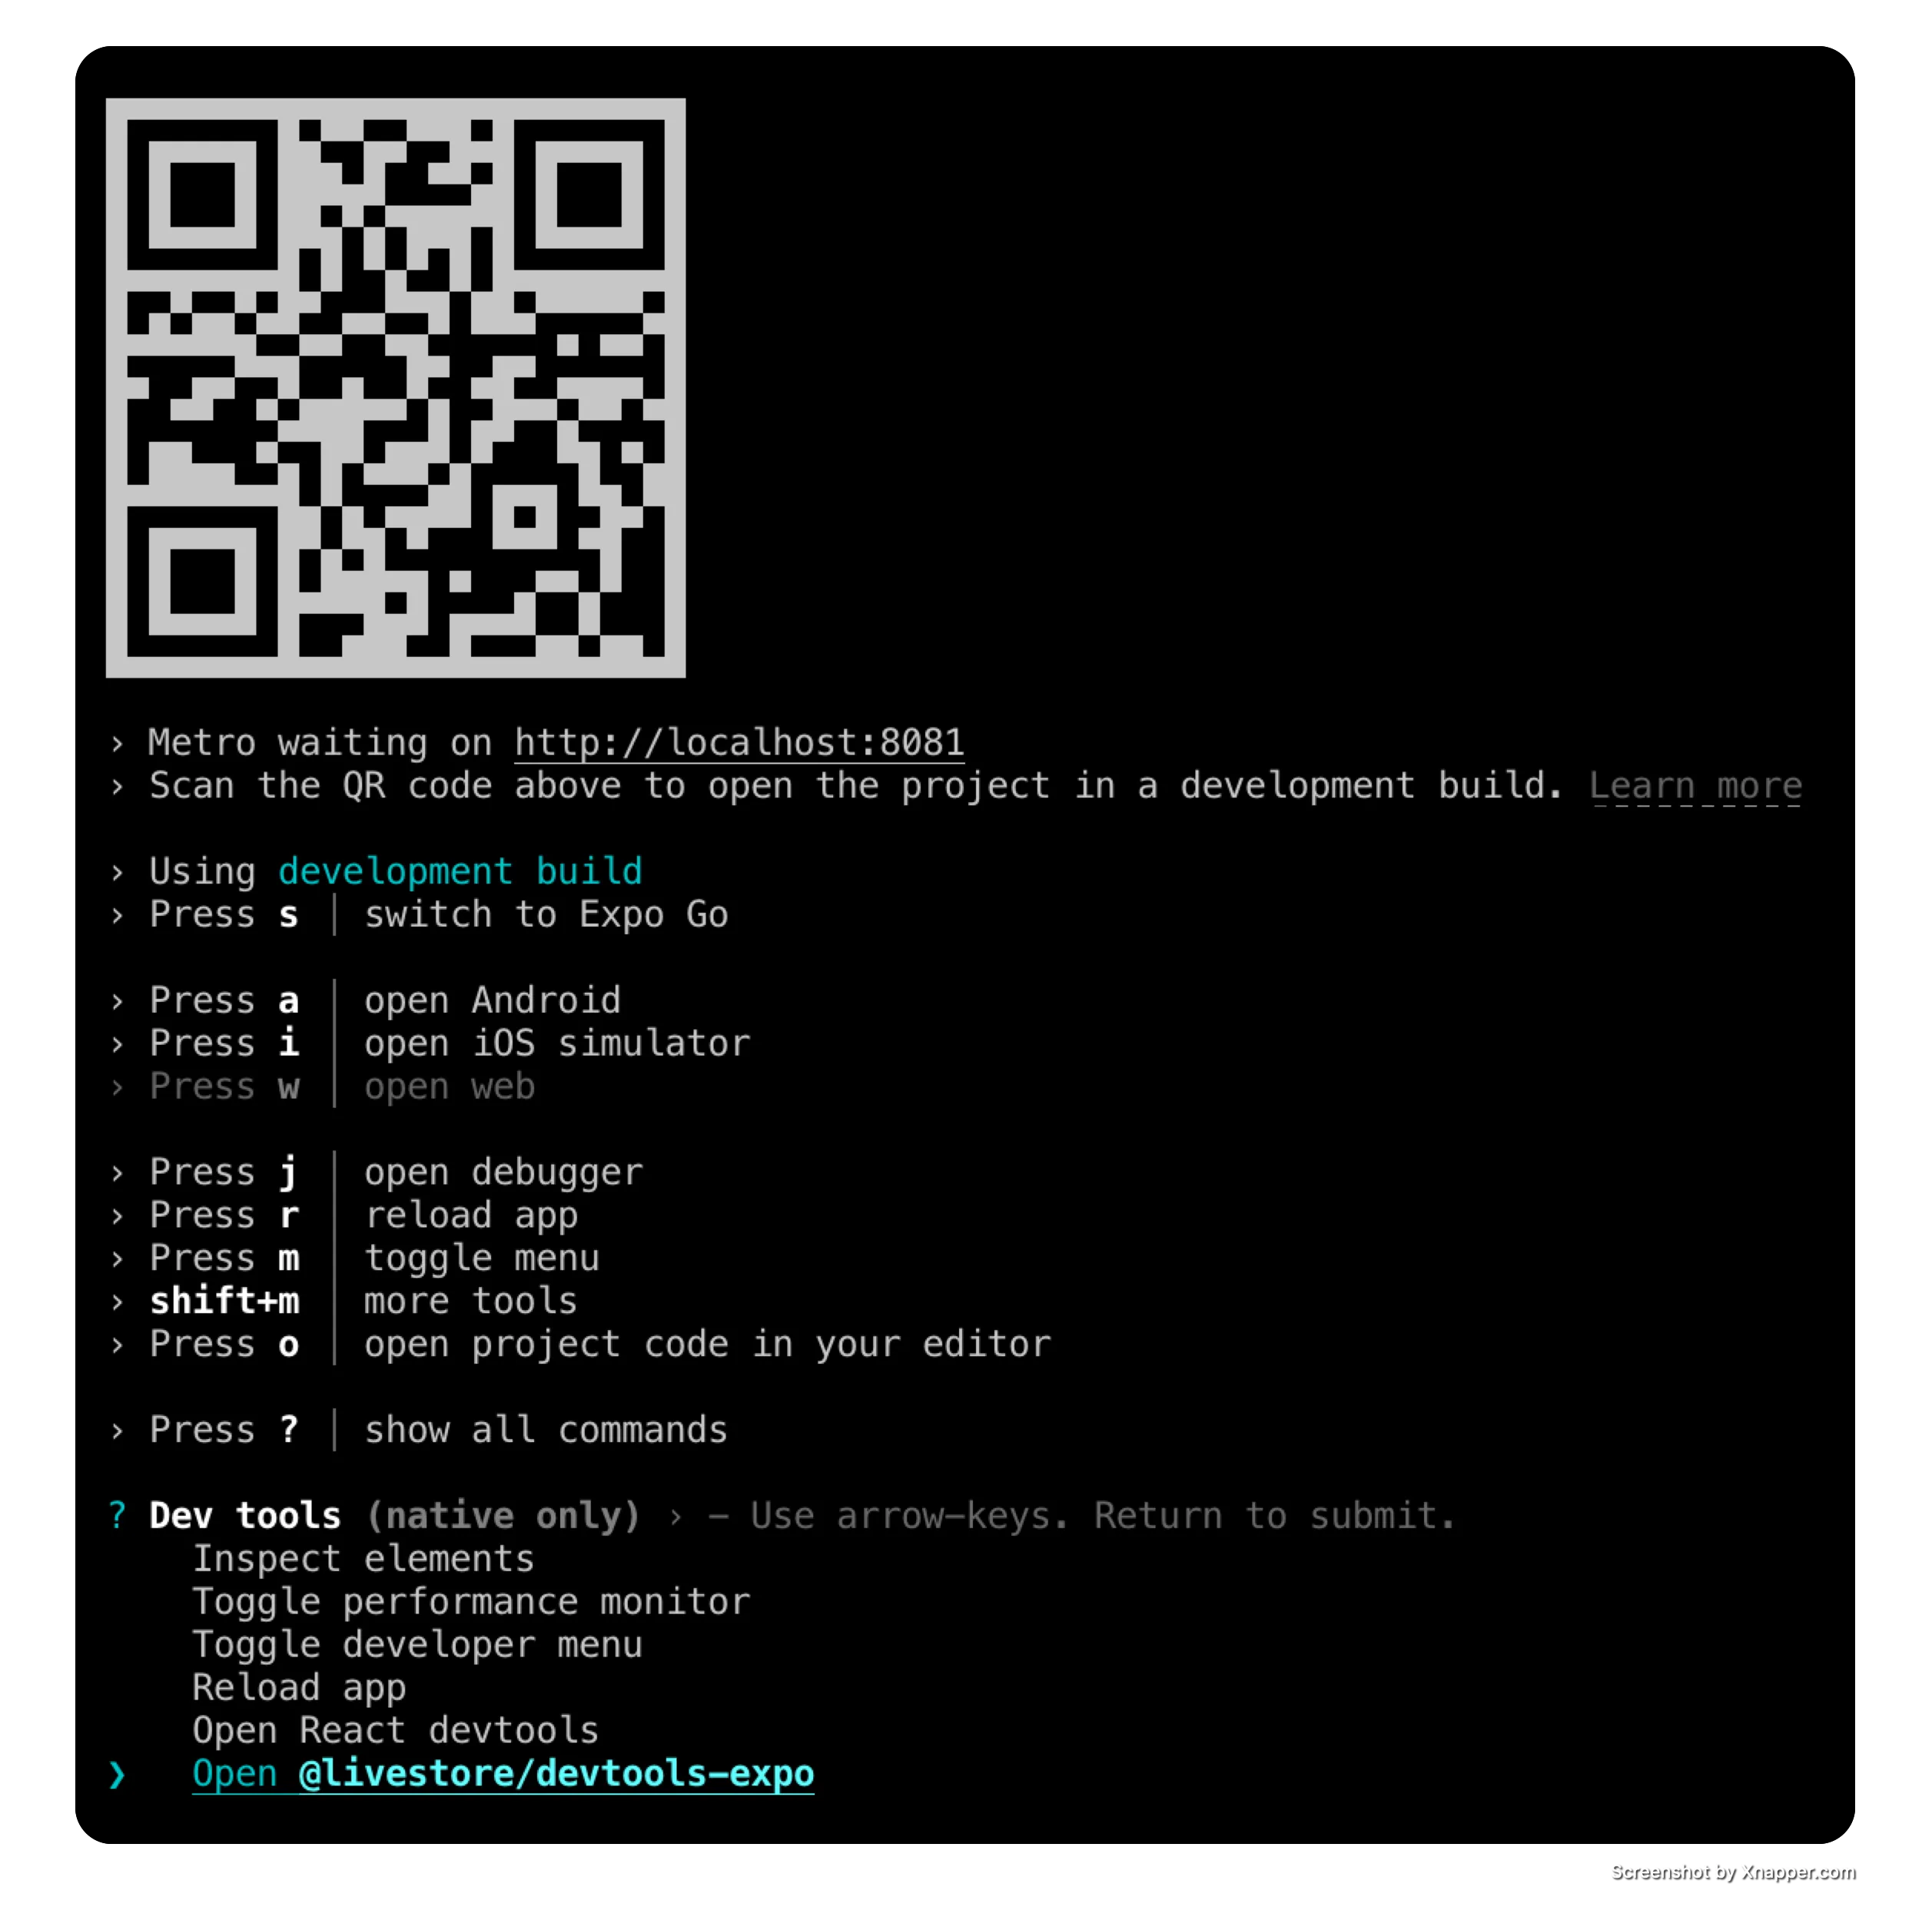
This will open the devtools in a new tab in your default browser.
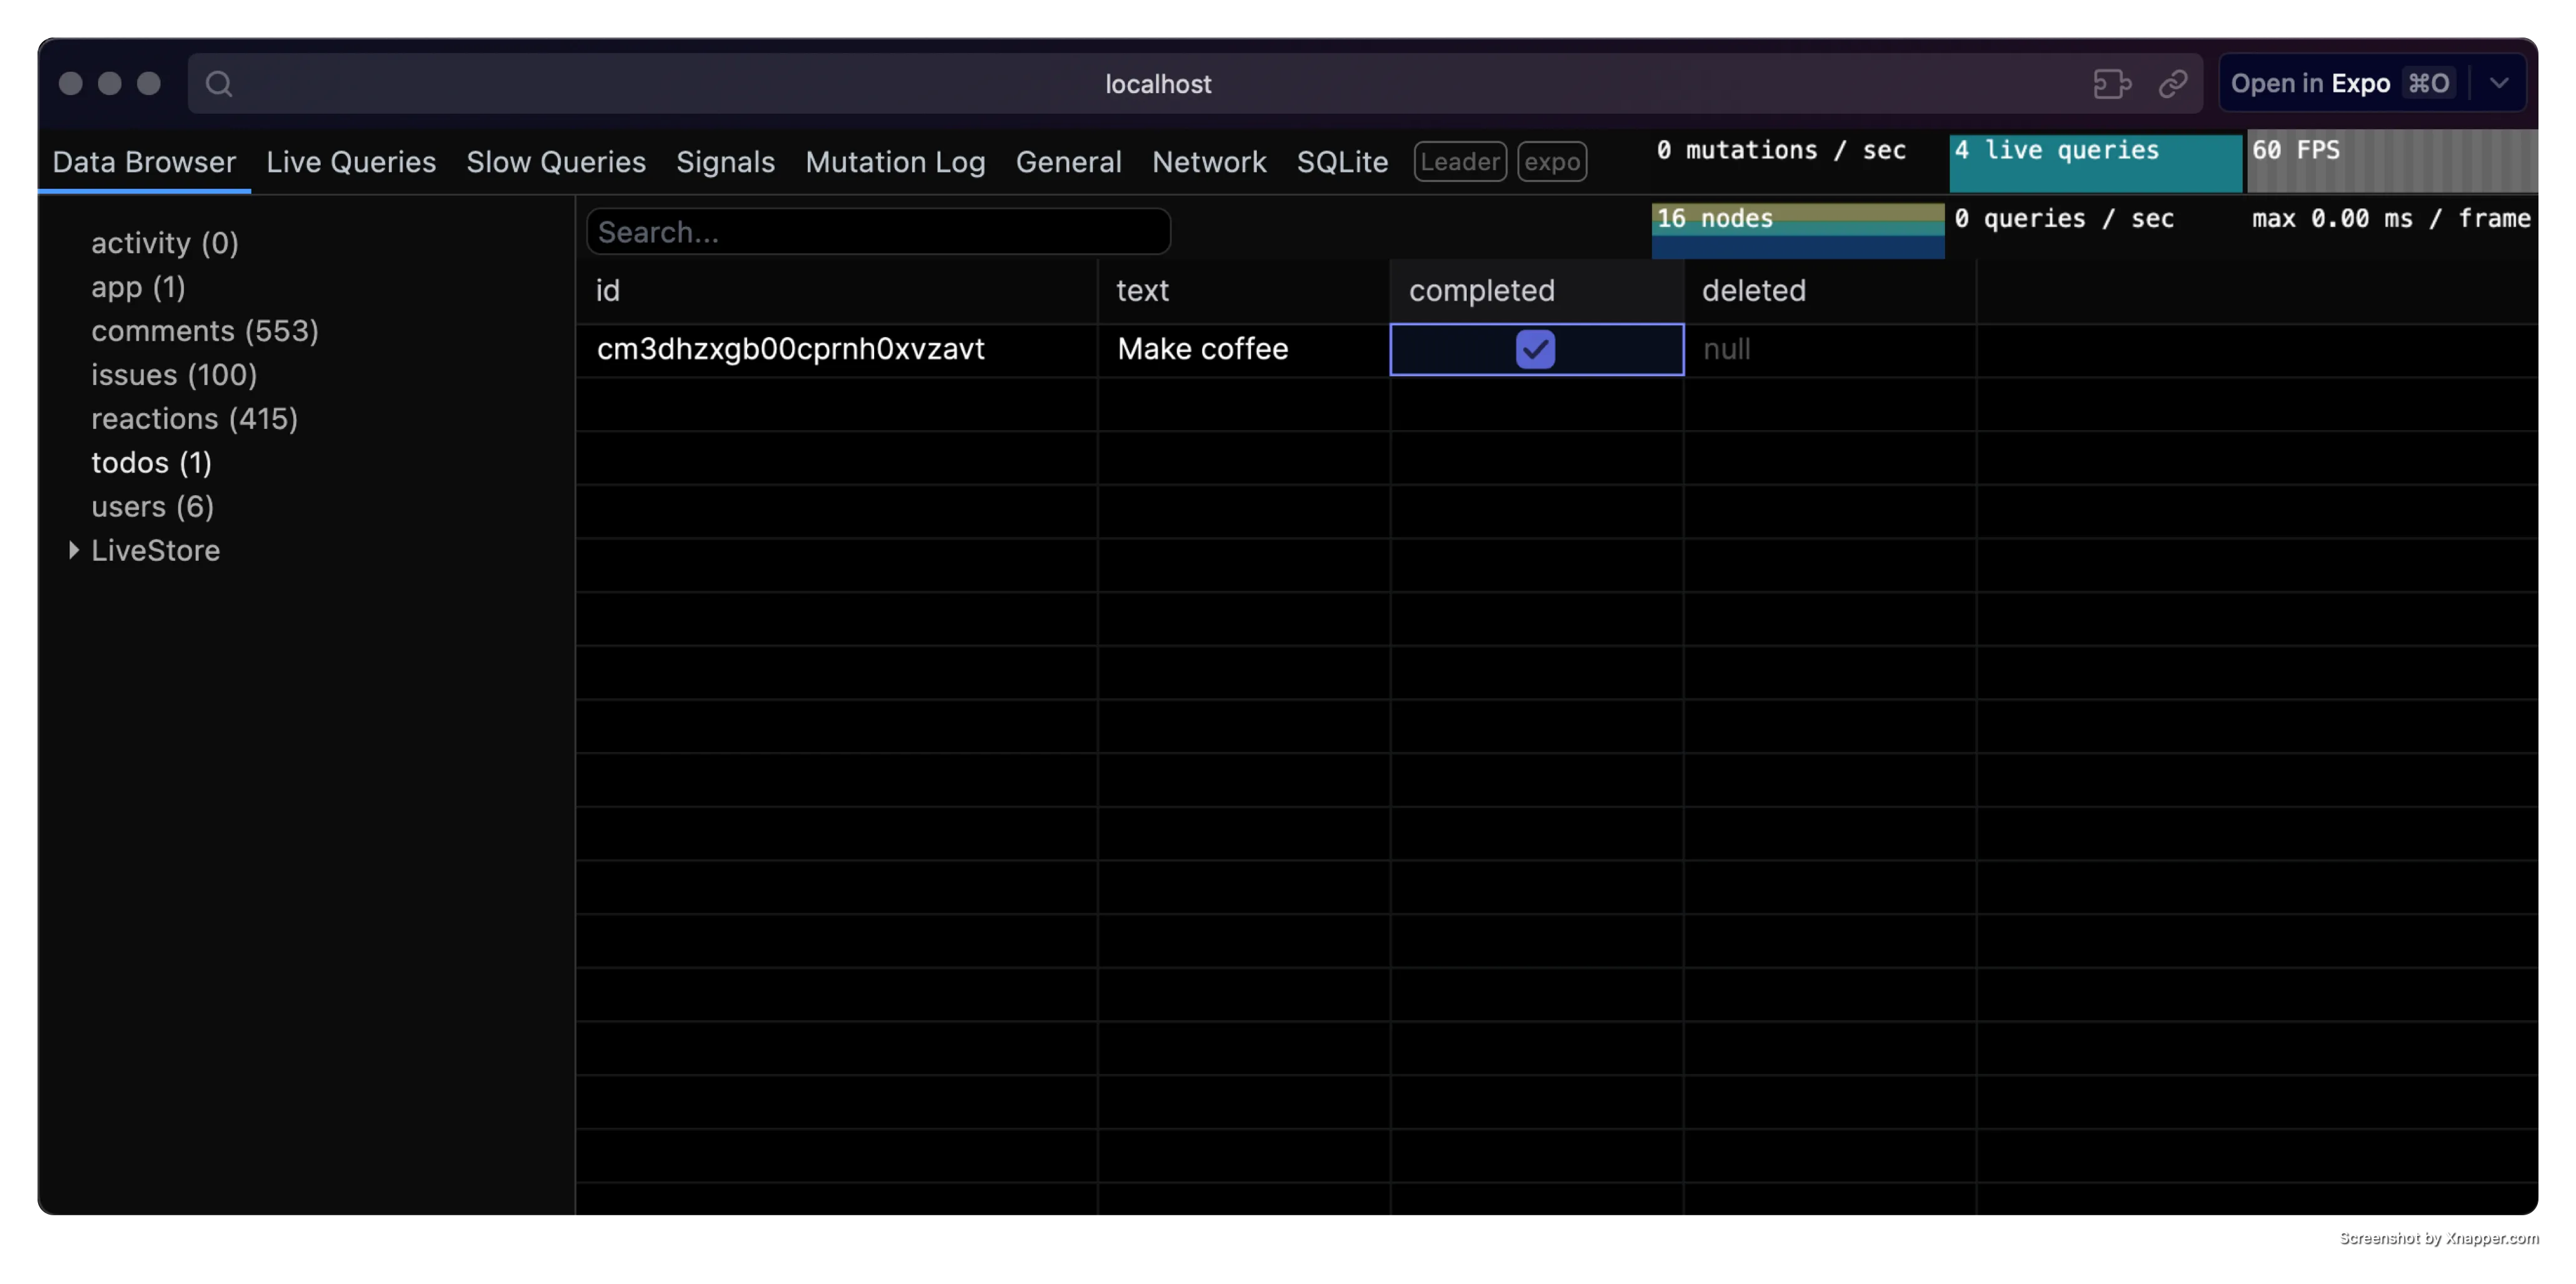
Use the devtools to inspect the state of your LiveStore database, execute events, track performance, and more.
Database location
Section titled “Database location”With Expo Go
Section titled “With Expo Go”To open the database in Finder, run the following command in your terminal:
open $(find $(xcrun simctl get_app_container booted host.exp.Exponent data) -path "*/Documents/ExponentExperienceData/*livestore-expo*" -print -quit)/SQLiteWith development builds
Section titled “With development builds”For development builds, the app SQLite database is stored in the app’s Library directory.
Example:
/Users/<USERNAME>/Library/Developer/CoreSimulator/Devices/<DEVICE_ID>/data/Containers/Data/Application/<APP_ID>/Documents/SQLite/app.db
To open the database in Finder, run the following command in your terminal:
open $(xcrun simctl get_app_container booted [APP_BUNDLE_ID] data)/Documents/SQLiteReplace [APP_BUNDLE_ID] with your app’s bundle ID. e.g. dev.livestore.livestore-expo.
Further notes
Section titled “Further notes”- LiveStore doesn’t yet support Expo Web (see #130)